Even the most precisely fabricated welded steel frame will underperform if installation is mishandled. Proper site preparation, leveling, anchoring, and post-installation inspection are critical to achieving the structural integrity that the fabrication design intended. This guide covers practical installation methods, common pitfalls, and a real-world case study drawn from our 20+ years of manufacturing experience serving the Australian B2B market.
The Critical Role of Welding Quality in Base Plate Performance
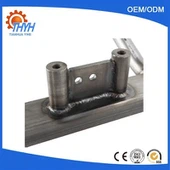
Before installation begins, it is essential to verify that the welded base plates meet specification. The base plate is the interface between the steel frame and the concrete foundation-any weld defects at this junction compromise the entire structure's load transfer capability.
Critical base plate weld inspection points include:
Weld throat thickness: Must meet or exceed the minimum specified on the engineering drawing. Under-throat welds reduce joint capacity proportionally.
Root penetration: For full-penetration welds, verify complete root fusion. Incomplete penetration creates stress concentration points prone to fatigue cracking.
Weld toe geometry: Smooth transitions at the weld toe (radius ≥ 1mm) reduce stress concentration factors by up to 40% compared to sharp notches.
Surface defects: No cracks, porosity, or undercut exceeding 0.5mm depth per AS/NZS 1554.1 acceptance criteria.
Site Preparation and Foundation Requirements
Successful installation begins with the foundation. Key requirements:
Concrete strength: Minimum 25 MPa (typically 32 MPa for heavy equipment bases). Allow 28-day curing before frame installation.
Surface flatness: Foundation surface should be flat within ±3mm per meter. Use non-shrink grout to compensate for minor surface irregularities.
Anchor bolt placement: Template-set anchor bolts during concrete pour. Verify bolt pattern against frame base plate holes-tolerance ±5mm in any direction.
Drainage: Ensure the foundation slopes away from the frame base to prevent water accumulation, which accelerates corrosion at the steel-concrete interface.
Installation Methods
Method 1: Grout-Bedded Installation (Recommended for Heavy Equipment)
Position the frame on adjustable shim plates (typically 50×50mm steel shims) at each anchor bolt location.
Level the frame using precision spirit level or laser level. Target: ±1mm per meter in both directions.
Torque anchor bolts to specified value (typically 50–80% of final torque for initial setting).
Pour non-shrink cementitious grout (minimum 25 MPa) under the base plate, ensuring complete coverage with no voids. Use grout holes if the base plate exceeds 600mm in any dimension.
After grout cures (24–48 hours), apply final torque to anchor bolts in a star pattern sequence.
Method 2: Direct Bearing Installation (For Lighter Frames)
Apply a layer of epoxy mortar or dry-pack grout to the foundation surface.
Lower the frame onto the prepared surface, aligning with anchor bolts.
Level and align the frame, then torque bolts to specification.
Seal the base plate perimeter with silicone sealant to prevent moisture ingress.
Case Study: Mining Equipment Base Frame Installation
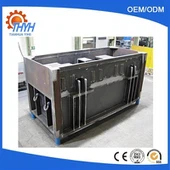
A recent project involved fabricating and installing a heavy-duty welded steel base frame for a mineral processing equipment skid at a Western Australian mine site. The frame, fabricated from Q345 steel plate (25mm main members, 16mm gussets), measured 4.2m × 2.8m × 1.5m and weighed 3.2 tonnes.
Key fabrication considerations:
Robotic SAW welding for main structural joints to ensure consistent penetration on thick plate
Post-weld stress relief at 600°C for 2 hours to minimize residual stresses
Final machining of the top mounting surface to achieve flatness of 0.3mm across the full 4.2m length
AS/NZS 4680 hot-dip galvanizing for 50+ year corrosion protection in the mine's aggressive environment
Installation outcome: The frame was installed on a 32 MPa concrete pad using the grout-bedded method. Total installation time: 6 hours (excluding grout curing). Post-installation NDT confirmed no weld degradation during transport and installation. The frame has been in continuous service for 18 months with zero structural issues.
Post-Installation Inspection Checklist
Verify frame level: ±1mm/m in both directions
Check all anchor bolt torques against specification
Inspect grout for voids or cracking
Verify weld integrity at base plate-to-column connections (visual + MT if specified)
Confirm HDG coating integrity-no damage during installation
Document as-built dimensions and installation records for project handover
Key Takeaways
Weld quality at base plate connections is critical-verify throat thickness, root penetration, and toe geometry before installation
Grout-bedded installation is recommended for heavy equipment frames; direct bearing suits lighter applications
Foundation flatness within ±3mm/m and properly placed anchor bolts are non-negotiable prerequisites
Post-weld stress relief and final machining ensure long-term dimensional stability
Always perform post-installation inspection and document as-built conditions
Need Welded Steel Frames Fabricated to Spec?
From design consultation to final installation support, our team delivers complete welded steel frame solutions. 20+ years serving Australian mining, construction, and industrial sectors.
Email: andywang@qdthyhmetalfab.com | WhatsApp: +86 138 6398 9651
Request a fabrication quote | Read about our design and component engineering capabilities